Cleaning your tyres is a crucial part of detailing. The secret to that sleek, looks-like-new finish? Tyre dressing. Tyre dressing compounds can restore your old tyres, so they look box fresh, giving your car a premium look. Tyre dressings also protect and preserve your tyres.
Tyre dressing provides instant results, but over time, even the best tyre dressing formulas can look tired – and need to be removed and replaced. In this guide on how to remove old tyre dressings, we’ll show you how you can take it off and prepare your tyres for another coating of restorative compound.
What is tyre dressing (and why do I need to remove it)?
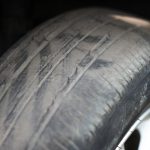
Tyres pick up a nasty coating of dirt, dust, mud and grime that can cause them to lose their lustre. Anyone serious about what they drive understands the importance of detailing and taking care of every aspect of your car’s appearance – including the tyres.
Tyre dressings are sprayable compounds that stick to your tyres, restoring the rubber so it looks as good as new. It’s not just about appearance; the protective coating can also extend the lifespan of your tyres.
All good things must come to an end and tyre dressings don’t last forever. Tyre dressing can last anything from a few weeks to a few months. When the appearance begins to fade, you’ll need to remove the old dressing before replacing it.
But how do you remove old tyre dressings? We’ll show you…
What you’ll need to remove old tyre dressings
-
A stiff wheel brush (that won’t damage the wheel)
-
Pressure washer or hosepipe
-
2 x towels (one for the wheel, one for the tyres)
-
Tyre dressing ready for a new coat
Step-by-step guide to removing old tyre dressings
We hope you’ve got all the kit you’ll need and a safe place to get to work. Here’s a step-by-step guide on removing old tyre dressings.
Prepare your tyre cleaner
Most tyre cleaners will need to be diluted before use. Follow the instructions on the bottle to prepare your tyre cleaner. Avoid mixing your cleaner on a patio or any other surface at risk of staining.
Ensure the wheel and tyre are cool
It’s important that the wheel and tyres are accessible and are cool before starting. We recommend finding a level surface with enough space to scrub each tyre.
Apply the tyre cleaner
It’s time to get to work! Read the instructions on your tyre cleaner and follow them. Apply the tyre cleaner to the tyre ensuring you’ve covered every part of it.
(There will be a small patch that’s touching the floor. If you’re serious about detailing, you must move your car forwards or backwards a little to access it.)
Use the stiff brush to remove the old tyre dressing
The tyre cleaner should help to loosen the tyre dressing, but you’ll still need to do some work. Use a stiff brush to remove the dressing. Take care not to scuff or damage your wheels during this process.
If the foam turns brown, it’s working!
If the foam turns brown, it’s a good sign that the tyre dressing is coming off. Work your way around the whole tyre, applying pressure where needed to remove the rest of the tyre dressing.
Rinse the tyre and wheel
If you’re happy you’ve removed the tyre dressing, use a pressure washer or hosepipe to wash away any residue and leave the tyre ready for the next stage.
Use the towels to dry the tyre and wheel
Now, dry the tyre and wheel using towels. (Obviously, don’t use the same towel to dry the tyre and wheel, or you could damage them!) Don’t apply pressure to the wheel or tyre; instead, pat them dry to soak up the liquid.
You’re now ready to reapply a tyre dressing…
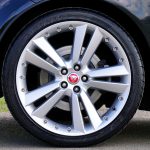
Once you’ve safely removed the tyre dressing, you can apply another coat to restore its shine.
Check out Halfords for the best deals on car detailing products
At Halfords, you’ll find everything you need to clean, prime, pimp and protect your car. Along with tyre cleaners and dressings, you’ll find a huge range of car detailing products from the biggest brand names at great prices. With everything available to buy in-store and online, there is no excuse for driving a dirty car.