It’s easy to underestimate how much regular care, attention, and cleaning can affect your rides, but a well-performing bike is often the result of a comprehensive maintenance routine.
Whether you’re a regular commuter, a leisurely weekend rider, or a thrill-seeking MTB trail rider, signs of wear and tear are likely to appear without due care. So, we’re breaking down our top tips for bike maintenance, including the tools you should keep handy, how best to clean and lubricate your bike, and what to do if something breaks.
What to keep in your toolbox
There are so many tools and accessories out there that it can be hard to figure out what you’ll actually need. If you’re starting from scratch, here’s what you need to keep your bike in good working order:
- A bike repair stand – carry out routine checks and in-depth fixes easily with a stand to hold your bike off the floor
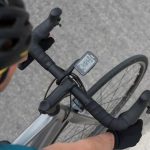
- Allen keys – a must-have for quick adjustments when you’re out riding, and easy to carry in a pannier bag
- A torque wrench – this is always handy to have to make sure your bolts aren’t too tight or too loose
- A floor pump with a pressure gauge – while hand pumps are great for quick top-ups on the go, we’d recommend keeping a floor pump at a home to get a really accurate inflation before you set off
- Screwdrivers – ideally, you’ll want both a flat head and a Phillips head to handle different screw styles across your bike
- Tyre levers – perfect for easily removing tyres without damaging the rim or inner tube
- Cable cutters – make clean and precise cuts when changing cables
- Chain tool – if you’re replacing your own chain, this is a must-have
- Spoke key – easily adjust the tension of your spokes
- Pedal spanner – a spanner designed for removing pedals, with an offset head and longer handle for an easy job
What to check before you ride
Before you set off on any ride, there are a few key components of your bike that we’d always recommend assessing first. While quick and easy t do, it can be the difference between a safe ride and an accident, so it’s best to get acquainted with your bike before every trip to make sure that everything looks right.
Tyres
Before every ride, feel your tyres to make sure they’re firm and fully inflated, and visually check for any nicks or punctures. If they don’t feel firm, top them up with your floor pump. You can find the recommended tyre pressure, or PSI, on the sidewall of your tyre.
Chain
Check that your chain is running smoothly through the cassette and derailleur by slowly turning one of your pedals backwards, and lubricate the chain if it’s sticking. You should also visually inspect your chain and gears for any damage or obvious issues.
Brakes
Being able to stop when you need to is one of the most important safety factors of your ride, so squeeze your front and rear brake levers to check that your brakes are engaging – your lever shouldn’t be able to pull back fully to the handlebar. You should also visually inspect your brake pads and the braking action on each wheel to make sure that the brakes are gripping properly.
Cleaning and lubricating your bike
How often you need to clean your bike depends on a few factors: how often you ride, the time of year, and typically how dirty your bike gets. Making time for a regular clean will not only keep your bike looking fresh, but it’ll also extend the life of its fine components and moving parts, for a happier and healthier bike.
What you’ll need:
- A bucket of water or a hose
- Bike cleaner
- Degreaser or drivetrain cleaner
- Bike brushes or a sponge
- Bike lubricant (wet, dry, or all-weather)
- Microfibre cloths
Washing your bike
We’d always recommend starting with your drivetrain, as this is often the grimiest part of the bike. Leaving this until after you’ve washed the main frame will likely result in mud spatter, so it’s best to get this clean first.
To tackle your drivetrain, shake your degreaser or drivetrain cleaner and apply it to your chain, cassettes, and derailleurs. Let it sit for a few minutes to break down any stubborn grease and grime, then use a brush to agitate any heavily soiled or hard-to-reach places. Once everything’s been targeted, rinse with water and make sure that all the product has been removed.
With the chain now dirt-free, you can begin washing the main frame of the bike. First, rinse with water to remove any surface dirt. If you’re using a hose pipe, make sure you don’t blast water directly at any delicate areas like your bearings as this could damage them.
Once everything has been rinsed, you can go in with your bike cleaner of choice, leaving it to soak for a few minutes. Top tip – avoid leaving your bike in direct sunlight during this dwell time.
You can then agitate any stubborn dirt with a soft brush or a sponge. For any hard-to-reach spots, try a detailing brush to really target these areas. You can then rinse off again, making sure you wash away any product residue and are careful around any delicate areas.
If your bike has disc brakes, you can use a dedicated disc brake cleaner to remove any oil and grease build-up from your pads and discs. Top tip – be sure not to spill this product onto any of your bike’s other surfaces.
Once you’ve cleaned your bike, be sure to dry it with a microfibre towel or cloth to help to prevent any rusting or watermarks. Make sure to thoroughly dry any tight areas that moisture could cling to, like bolt heads.
Protecting your bike
With your bike clean and dry, it’s time to lubricate your drivetrain. Chain lubes come in three different types, wet, dry, or all-weather, and the right one for you will depend on your average ride.
Wet lube is designed for wet and muddy conditions – it’s durable and long-lasting but will attract a build-up of grime over time due to its sticky texture. Dry lube is lightweight and applies as a liquid before drying down to a waxy consistency. It’s as durable as wet lube and washes off easily with water.
To apply your chosen lube, slowly rotate the pedals backwards and apply lubricant to each link, then wipe away any excess with a rag. You should leave your bike overnight once you’ve lubricated your chain, to give the lube chance to penetrate into the links.
Quick fixes for common bike problems
Most of the time there are handy hacks you can do to tide you over whilst out and about, and we’ve taken a look into the most common bike problems and solutions:
- Clicking saddle – make sure that the bolts connecting your saddle to the seat post are not loose. If they are, use an Allen key to tighten until the saddle is firmly secured.
- Squealing brakes – this could be down to dirt or oil on the brake pads. Give it a quick wipe down initially, then when you get home, take the brake pads off and readjust.
- Squeaky derailleur – apply a small amount of lubricant and wipe away any excess.
- Creaky pedals – dry pedal bearings, loose crank arms or a worn bottom bracket could be the cause. Once home, remove and lube your pedal bearings, and tighten and lube the crank arms. If this still doesn’t solve the issue, you may need to replace the bottom bracket.
For advice on how to conduct more in-depth bike checks, check out our blog here.
Something more serious? Consult the experts
If there’s a deeper issue with an element of your bike and you’re not sure how best to fix it, Halfords is here to help. Our expert colleagues are always on hand with our range of cycling services and repairs.
You can get your bike checked over at one of over 350 stores, and all our work is guaranteed for 6 months, so you can ride away happy. If you’d just like the peace of mind that everything’s working as it should, then why not book a free bike check? This 32-point pre-repair assessment is carried out by one of our fully trained technicians while you wait, to spot any problems or issues before they become serious. We can look at any bike, adults or kids, in any discipline.
So, that’s our guide for keeping your bike in top condition to make sure your fun in the saddle doesn’t end before you want it to. For more tips and tricks, head over to the cycling help & advice section of Halfords.com, or browse our full range of cycling tools and accessories.
You want quality cycling, you want Halfords.